from sarah the sewist
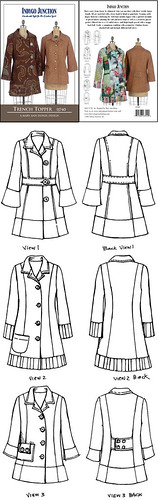
My Indygo Junction Trench Topper that I was sewing as part of the Great Trench Coat Sew-a-long on Pattern Review is finished and I broke it in by wearing it to work today. I was a little uncomfortable with it just because it's a lot louder than most of my wardrobe, but it worked with dark jeans, a white collared blouse and my black cowboy boots. Someone even told me that it gave off a "vintage cool vibe," which sounds good to me. Not to mention, Josh and I went out to The Screen Door (yum!) for dinner this evening, and he claims that two diners noticed on my jacket. My style is generally not that noticeable, more cute than anything, so it's kind of nice to have something distinct and eye-catching. 
I wrote about my progress here and here and it was really fun knowing that there were quite a few other folks working on a trench at the same time---although mine is more of an indoors jacket, rather than the outwear most of the others on Pattern Review are planning and sewing. It's funny, I was planning on sewing this jacket, but it jumped to the top of the queue when the sew-a-long was announced. The super-cool Amy Butler print from Bolt in an unusual cinnamon color and the lovely pink Moda fabric from Fabric Depot for the contrasting bands were a fun combination.
I covered the issues that I had with this pattern in my last blog entry, but I do want to re-iterate that while I had some problems, they were completely fixable and Indygo Junction seemed very happy to get the feedback about the errors in the pattern drafting. The other thing I noticed with this pattern is that it's already rather petite-ified. By that I mean that I didn't shorten the sleeves, and only took in the shoulders a smidge---which was great for me. My fix to the belt issue worked, and I think it looks like it was supposed to be this way.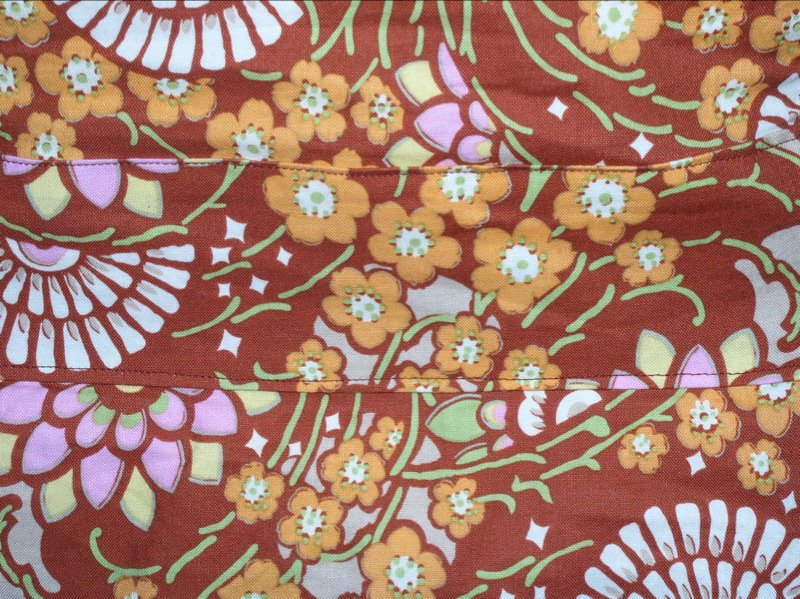
Anyway, since this jacket is unlined, and since the Sewer and I don't have a serger (waaaah!), there was a lot of seam finishing on this jacket. Which was a colossal pain in the butt. Well worth it, but a pain, nonetheless.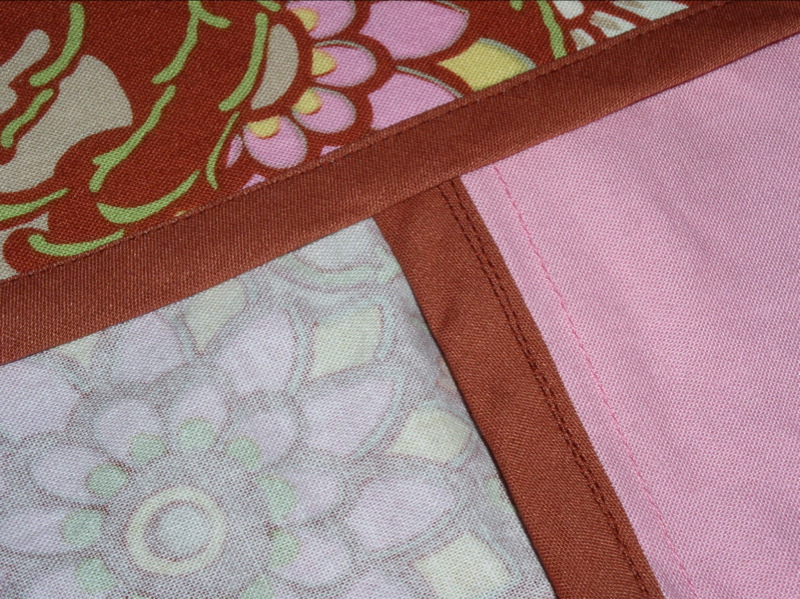
I also faced the pink bands at the sleeves and bottom so that they'd have more of a structured look and flare out a bit more. Which I think turned out pretty nice, since the two fabrics were different weights. The contrasting bands actually, oddly, toned down the busy look of the main fabric, which is sort of interesting.
I must have placed the three stupid button on this jacket at least three times. Each. It was really difficult to figure out the right spot for the buttons, and I still not completely satisfied with the way the buttons look on the jacket. I am really crappy at hand sewing and avoid doing so at all costs. Our sewing machine does a lot for us---including auto buttonholes and it's really easy to use the machine to attach buttons. However, like I mentioned in a previous entry, the buttons I chose for this jacket were too big for the auto buttonholer, and it turns out, also are too big to sew on with the sewing machine. Which sucked. So I spent all of last evening sewing and re-sewing the buttons.
Basically, the buttons won.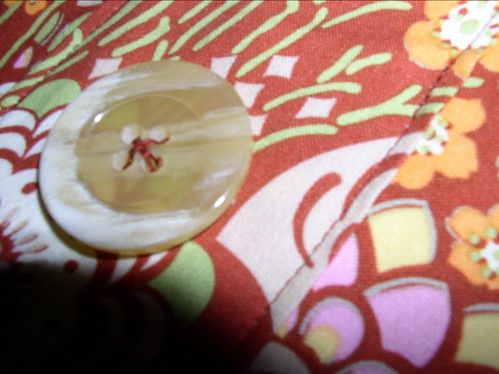
I'm planning to make this trench again, especially since I've worked out all of the weirdness with the pattern, and since I have a decent stash of raincoat fabric on hand.
Wednesday, September 26, 2007
Out of the Trenches
Monday, September 24, 2007
In the Trenches, Part 2
 from sarah the sewist
I'm making good progress on the Indygo Junction Trench Topper that I'm sewing as part of the Trench Coat Sew Along on Pattern Review. It's been fun being motivated by knowing that others are working on similar projects at the same time (and I feel a bit of extra pressure for it to look extra-fabulous); however, this project has had some silly problems.
First, the ones that are beyond my control: the sleeve markings are screwy on this trench coat---basically, there's no way to tell which side of the sleeve is the front and which is the back; the neck facing is way wide than the shoulder facing that it's supposed to be joined with, so I had to fix that issue; and the belt for the trench is waaaaaay to short. Like seven inches too short. Anyway, I worked through those issues, and am on the home stretch at this point. As an aside, I emailed the lovely folks at Indygo Junction and let them know about the problems I'd had with the drafting of the pattern, and they were fabulous, and seemed very appreciative of the feedback. I was very impressed---I've sent my observations of errors/issues in patterns to other companies (I figure everyone has an interest in having high quality patterns) and they're not always so receptive. Thanks, Indygo Junction!
Now, the issue that was basically my stubbornness getting the best of me. I'm using some really big buttons for this project. Like 1 5/8" in diameter. I needed to make one buttonhole. Well, since Josh and I got our fancy schmancy new Janome-made Kenmore 19233 sewing machine that has one-step automatic buttonholes, making buttonholes has been a dream. Seriously, this is probably my second-favorite feature on the machine (this first being the speed control). However, apparently, the auto feature doesn't allow for buttons over one inch. So I searched the owners manual, then the internet, then all of the Pattern Review message boards that had any reference to buttonholes, and Kenmore sewing machines. Then I just cried. Because I just couldn't make a stupid buttonhole. (Someone on Pattern Review posted the directions for overriding the auto function for the Janome equivalent machine, but it just wouldn't work for me.)
Anyway, I experimented.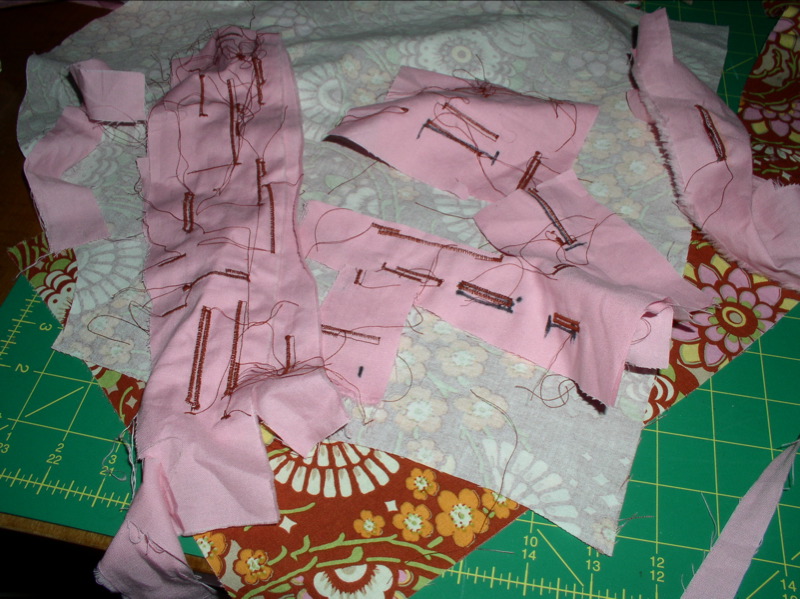
A lot.
Finally, I just fudged it, and it looks okay. I don't care that it's not perfect. At least I can get the damn button in the damn buttonhole and close the stupid thing. And that's all I really wanted.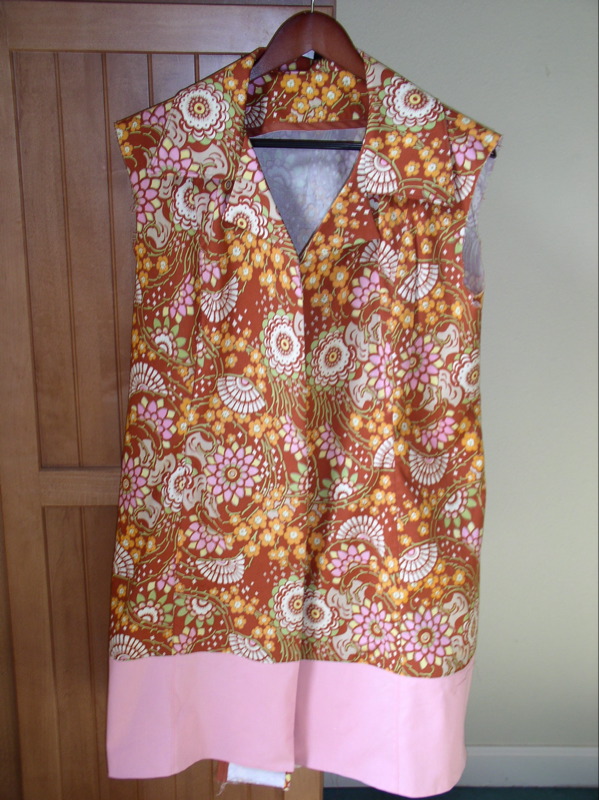
On the home stretch...
Saturday, September 22, 2007
Whale of a Jacket
from josh the sewer
I have working on another big fall project. Earlier in the summer (and summer lasts for about 4 more hours as I write this), I found this St. Louis Americans jacket that I really wanted to replicate. The Sewist and I decided to use Burda Pattern 8135 and gray corduroy. For the trim I found braided, folded-over cording in navy blue. This project is not going to be solo, it is by far the hardest sewing project I have undertaken. The pattern has twenty some pattern pieces!
Instead of doing a straight replica of the St. Louis Americans logo, I decided to do make the whale part of the Chicago Whales (of the short lived Federal League) logo. I went back and forth on making an "authentic" piece of sports wear, but I didn't want to make a Cincinnati Reds jacket (my favorite baseball team---insert loser reference here) or a minor league team from Dayton, (the original hometown) or Portland (the permanent hometown and birthplace of the Sewist). Instead I decided to create a fictitious team the Portland Whales, I should also have a nice fake back-story written in my mind on completion of the project.
Anyway, so far I have sewn the back panel together and decided to eliminate the vents (I hate vents, and my digestive system has matured enough where they aren't an occupational necessity). At this rate I should have this project ready in time for Summer '09.
Tuesday, September 18, 2007
In the Trenches
from sarah the sewist
The Pattern Review Great Trench Coat Sew Along has proved just the motivator for me to start planning and working on some fall jacket projects. I'm working on the Indygo Junction Trench Topper in view 1, which is a lovely, princess-seamed (woo-hoo! my fave--I love princess seams!) trench coat. I'm creating a light weight cotton jacket that should serve me well this fall---particularly in my insanely cold office building (my fingers literally turned blue one day and I thought I was having some sort of circulation episode, but it was actually the a/c---I wish I was joking).
The Sewer, with his amazingly sharp eye for fabric and design, found this Amy Butler Fabric for the body of the jacket, and I'm using a complementary plain pink cotton from Moda for the bottom panels and bell sleeves. (In case you haven't noticed by now, 50% of the fabric I by is pink, which is weird, since almost all the clothes I bought in my 30 years are some sort of shade of blue.) Anyway, it's a gorgeous cinnamon color that's not at all orange---I don't share Josh's fascination with caution orange.
I have been completely spacey with this project, though having already forgotten to cut out THREE pieces. Yes, I, with all of my sewing experience and my somewhat advanced skills, didn't both to check to see what pieces I needed to cut out. I just cut out what I had, and didn't do any accounting of the pieces. Low and behold, I had dropped the piece for the front side panel, and neglected to trace the back facing at all. Absolutely brilliant.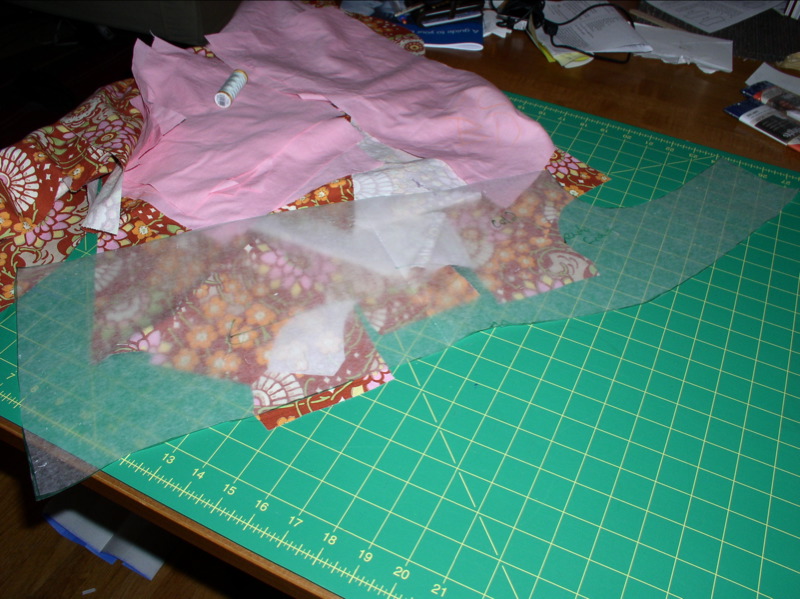
As you can see, the omitted piece was a fairly critical component of the jacket. Oh, yeah, and did I mention that I griped about how the pattern called for way too much fabric, and so I wasn't at all careful with how I cut out my pieces? So, of course, we had to go by another yard of fabric. Of course.
So, I've sewn a grand total of one seam on this thing. So, far, so good.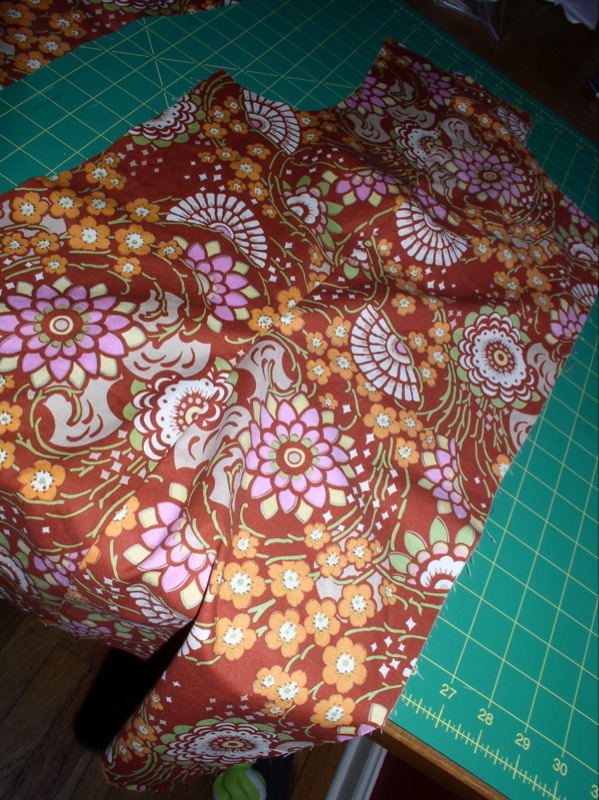
It doesn't look like I've sewn anything backward, upside-down or wrong-side out, does it?
(By the way, Josh is making some slow and steady progress on a jacket of his own, but I'll leave it to him to update you.)
Sunday, September 16, 2007
Pants-Pants Revolution!
from josh the sewer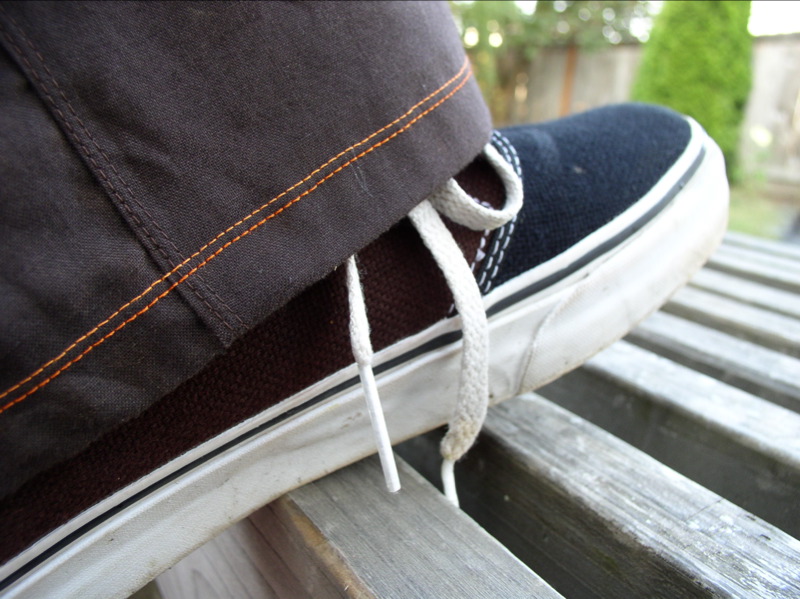
I have this friend who a couple of years ago was obsessed with Dance-Dance Revolution. He and his wife used to have dance offs and he was always getting off the phone to play the game. I have never played it before in my life, but I dedicate the title to him (and puns make good titles for blogs).
Anyway the pants I made were the second go 'round of the Simplicity 3891 cargo pants. Like the first time I left off most of the pockets and decided to pass on using the zipper on the leg, but instead of cutting the legs out at the pants line I cut them at the zipper line to make the legs narrower than before. This resulted in a much more reasonably-sized leg circumference.
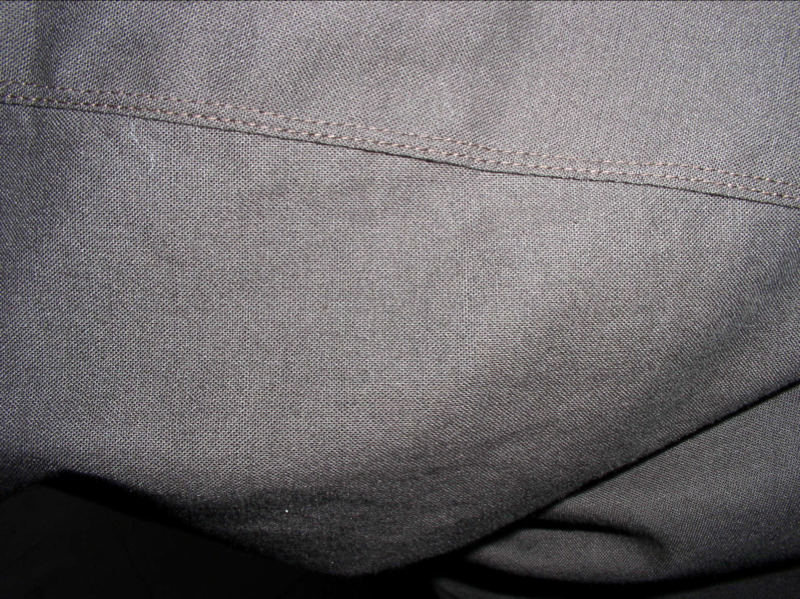
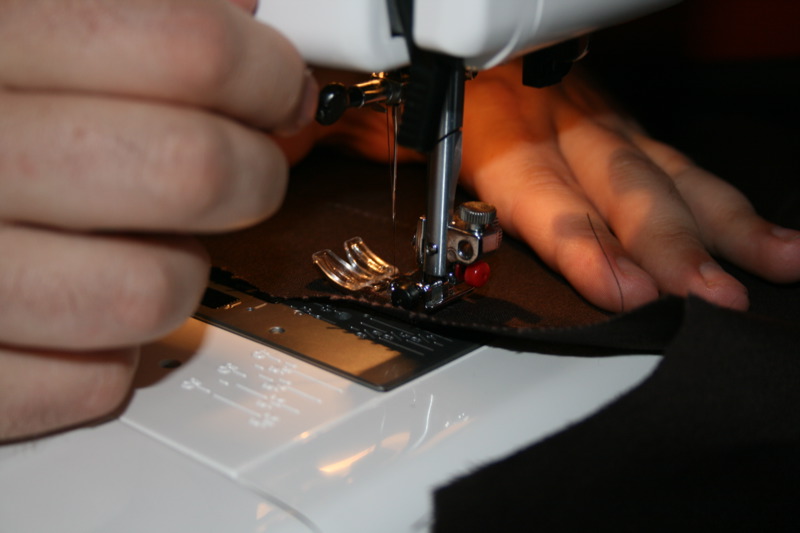
The pants are made with Robert Kauffman Kona Cotton in chocolate brown and the facing is made with the same fabric in caution orange; both were from Bolt. While at Nordstrom not too long ago I noticed a great pair of chino pants that were this color brown with orange top-stitching and details, the problem is I don't pay $150 for chinos; while there is nothing wrong with this, I just can't do it. In that same vein, to give the pants a more finished look I decided to take inspiration from Nordy's and the Sewist's latest skirt and use the twin needle to add some detail. I used brown thread to twin needle the pockets and the inseam. To do the hemming on the pants legs and to sew the facing down, I used the orange thread with the twin needle. I had some orange thread left over from a long ago project and when I bought the second spool I got the same color except it was made from cotton instead of silk, I like the effect of the subtle differences in shade.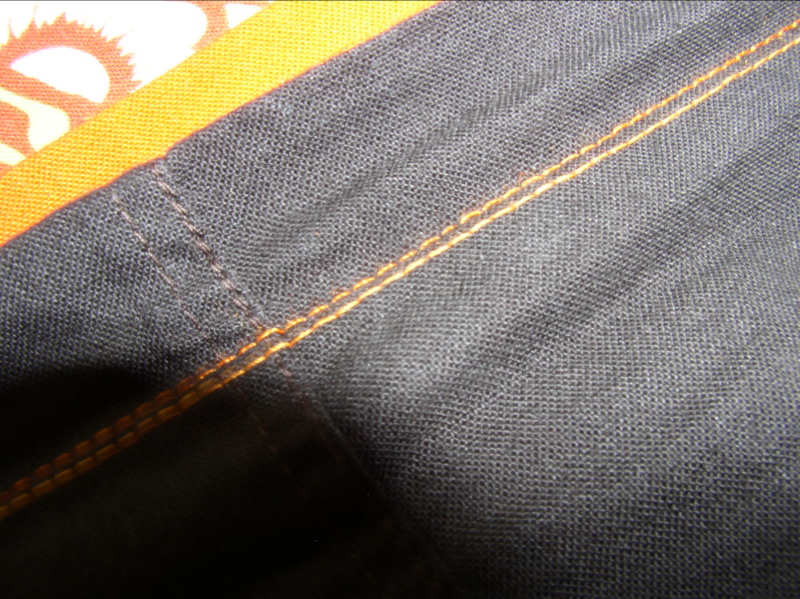
I also went with the caution orange zipper, just to pull the whole look together. Creating the fly was much, much easier this time and required far less intervention from the Sewist.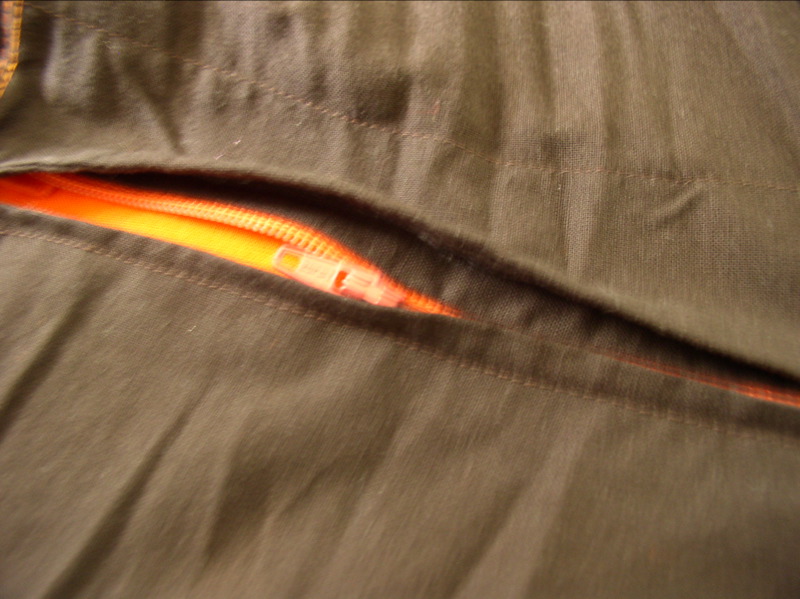
I love the way these pants fit and look. This was my first attempt at making something fancier than the pattern called for, which was a nice way to be creative and not go too far above my skill level. It was also the first time I actually changed any major component of a pattern (I've left stuff off, but never really altered anything intentionally.) Oh yeah, I should add that I used a button to close the pants instead of Velcro as called for (actually, I did this in the first pair as well)---I am committed to keeping my pants from falling down in public.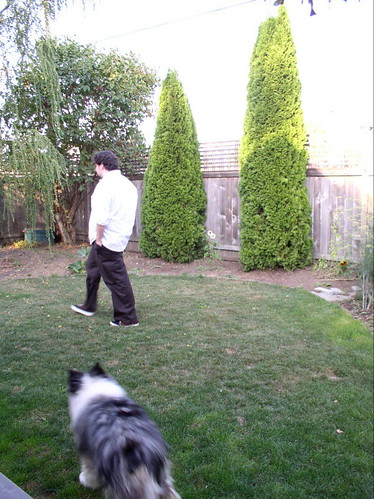 This also marks a major milestone in my sewing---this is my first completely seam ripper-free completed project.
Thursday, September 13, 2007
Another Burda WoF Skirt
from sarah the sewist
Between my Burda World of Fashion magazine subscription and my Sew What! Skirts book, I will never, ever have to purchase a skirt pattern again. This is a good thing, 'cause I'm cheap and skirt patterns always seem like a waste of money, since I'm probably not going to make a bunch of the same skirt. Pants, yes. Skirts, no.

Wonderfully, Burda has enough sense to include---in all their magazines---a variety of styles for different body types, and I'm loving the fact that this skirt was already sized for those of us who are not exactly tall. (I'm 5'4", but the fashion/sewing pattern industry has decided that I'm some sort of super-short freak, even though that's just a smidge shorter than the national average of 5'5". I often try on pants and they're probably 7 inches too long.) Anyone, wonderfully, there was no petitizing of this pattern for me, which fabulous.
I made this in the lovely brown stretch cotton sateen I got a Bolt awhile back, the same stuff I used for my super-awesome pink Hot Patterns shirt. I probably could have made better use out of this fabric by making the Hot Patterns Razor Sharp Classix Nouveau pants that I had been planning, but it's fantastically comfortable for a skirt, just doesn't drape and flip like Burda intended for this style. Which is fine with me.
I added a little pizazz to this one by taking a cue from the technical drawing above and adding a lot of topstitching.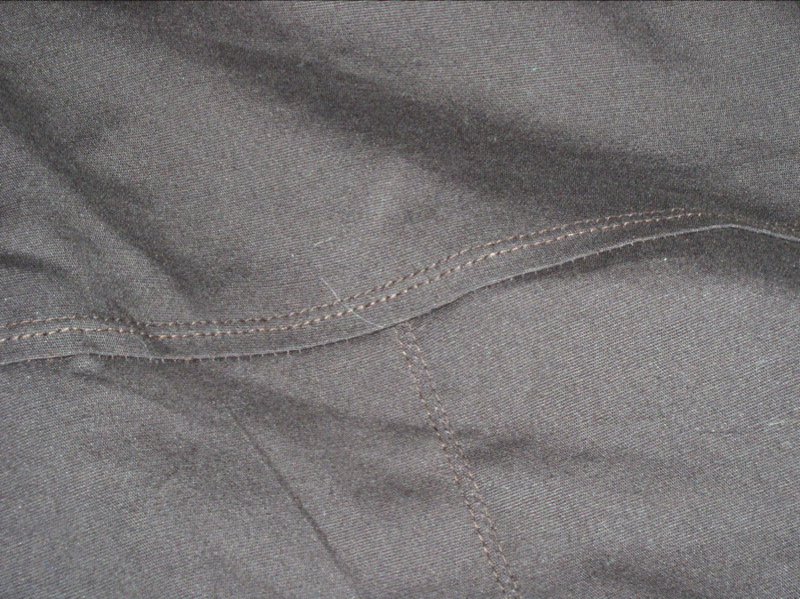
I topstitched on either side of the panel seams with the twin needle, switching to a single needle when the panels split and the gores are inserted. (Does that make sense?) I also twin needled the seam when the yoke meets that panels and the hem. All together, it really creates a tailored, professional look. (The rich brown doesn't hurt either.) Oh, and you'll be relieved to know that after four and a half attempts (!!!) I finally conquered the invisible zipper that just wouldn't cooperate.
(I'm still not sure about the Built by Wendy blouse I'm wearing in this picture. I've made it twice, but it's not been quite right either time.)
Saturday, September 8, 2007
Cat-tastic!!!
We don't have a cat. In fact, both of us are horribly allergic, and our dog thinks that cats are extremely suspect. So, no cats for us. However, we've got a lot of kitties in our extended family. Since we're beginning to embark on our Great Making Everyone's Christmas Gifts Odyssey, we decided that Josh's dad's cat, Lieutenant, really really needs a Kitty Tunnel from Amy Butler's In Stitches book. (We'll review the entire book soon---promise.) Not only that, Lieutenant needs, really needs, a funky-fresh, Miami Vice-style lime green flamingo print Kitty Tunnel lined with hot pink fluffy fur.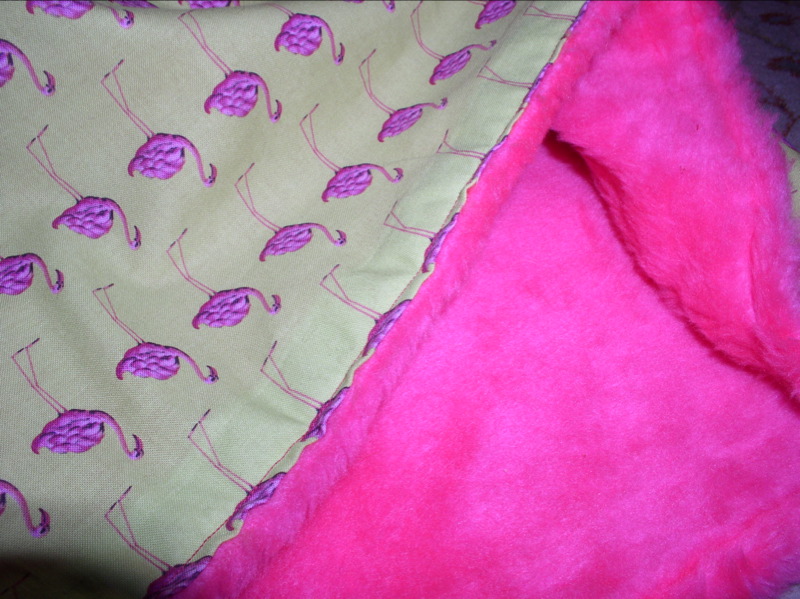
This is a super-basic "pattern" in the book. There actually aren't any pieces included, you simply go off of some measurements Amy provides to draft a tunnel and drawstring that's lined with faux fur. Basically, it's like a tube that closes on the end---apparently cats like to have options in their Kitty Tunnels, sometimes they want to go all the way through the tunnel, other times, they want to snuggle up in a cave.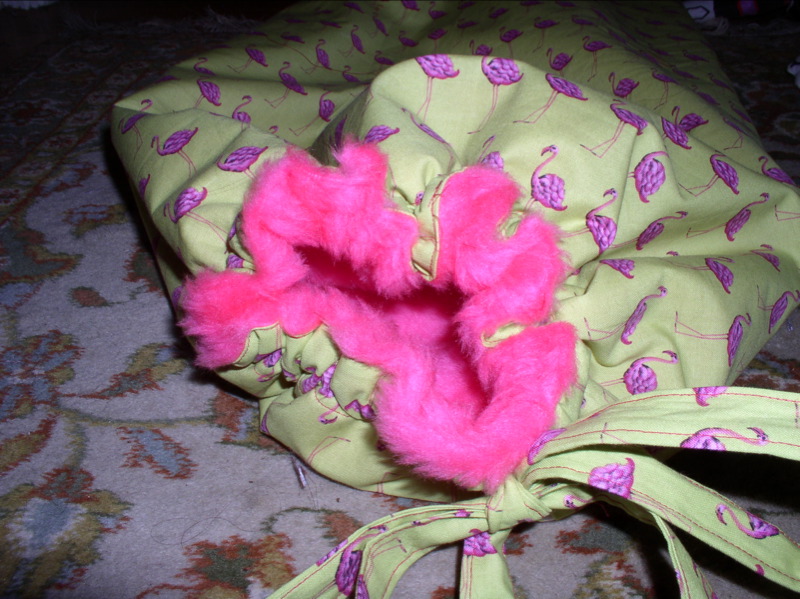
The picture from the book really shows a nice Kitty Tunnel that seems to fit in with the decor in a tasteful way. Our finished product is not exactly what normal people would call "tasteful." Josh's dad will love it. Love it. Seriously, it sort of sucks that we have to wait a few months to send it, because the result is so bizarrely awesome, that we know it'll be a hit. Even if you don't go a little over the edge like we did, this is a quick-to-sew, simple, inexpensive project that will probably thrill the cat or cat-lover in your life.
Our dog's stuffed raccoon toy had to stand in for the cat in this photo shoot. Needless, to say, the dog was not impressed.
(We swear, we don't encourage our dog to get in the pictures. She's camera ham. If we get out the camera, she's there. It's been that way since she was a puppy.)
Thursday, September 6, 2007
The Vinyl Countdown
 from josh the sewer
Pictured here is the Sewist's birthday gift. My Dad likes to say "Vinyl is Final" when explaining his choice of house siding; this phrase stuck with me as making this. Being somewhat limited in my sewing skills, my choice of projects are small. The Sewist loves bags so I decided to bust out the Amy Butler Messenger Bag pattern again. Instead of doing something that I could get through easily and quickly, I decided that she NEEDED a pink sparkly vinyl bag, to deal with the wet winters here in Oregonia. For the interior I went with the Echino Beehive in eggplant that I picked up from Bolt. The appliqué is reflective fabric, that kind you see on coats for high visibility. At the Mill End store they sell it in 12 x 18 sheets for $4. This is actually cool, at $25 a yard on the bolt it is much cheaper to buy the sheets to make tall and wide things.
The first part of the project was making the appliqué. I found a crow picture on the internet and blew it up in Photoshop. I printed it, cut it out of of paper, traced it onto the back of the reflective fabric and cut very carefully. I stitched the crow to the outside flap with silk and metallic thread that astonishingly matched perfectly. This part went really really well. I was feeling really good about the project at this point. Next was the vinyl (here the sound effect should sound like DUM, dum, dah; ominous like).
Wow, the sparkly vinyl is really cool and pretty, but my god it is hard to work with, especially if you have no idea what you are doing (see: me). I decided to make the strap first, though it is a middle step in the instructions. I like to get the little things out of the way first (and I am actually working on a separate post about this, because it is interesting how differently the Sewist and I look at directions). Following the pattern's directions, I folded the two sides toward the middle, to deal with fabrics stubbornness, I glued like crazy and stacked books on top to hold it down. After a couple of hours, I folded, glued and stacked again. Now it was time for the sewing. I actually was able to get it stitched, terribly. The vinyl was incredibly sticky and it took me PULLING it though. I figured this was bad for the machine, so I called the Sewist at work and spoiled the surprise. I was drenched in sweat, the strap was really terribly screwed up and the sewing machine looked tired. The Sewist was not impressed with what I was doing to her machine so I called it day.
The next time out I sewed the exterior together, which was going great when the right sides were together. So the problems were back again as soon as the exterior of the vinyl touched any part of the machine. I was really close to quiting and going to Nordstrom's and buying something, when it hit me that there has to be a way to do this (the Sewist mentioned a Teflon foot).  I googled "sewing vinyl" and on this site someone mentioned wax paper. Melting wax paper onto the exterior worked swimmingly. The other bit about working with the fabric is that is is impossible to iron the seems open, so I trimmed them short (but not too short). The last bit about the vinyl is it is really difficult to turn inside out.
The interior actually came together as expected.
For the strap I went with a different tactic, I cut a 3.25 inch wide slice of the exterior and 3.25 inch wide slice of the Enchino Beehive which I backed with fleece interfacing, like the straps from the Very Green Bag. I sewed everything right side together and turned inside out. I think with the strength of the vinyl one layer will be sufficient and the fleeced fabric should be pretty comfortable. Turning the strap right side out took some time and an incredibly sore finger, but the results are pretty nice, though a little puffy. I again stacked books on top of the strap to get it to lay flatter, which is working, though in need of another night at this point.
The changes to the original pattern include:
no tab, actually no clasp also, the flap is heavy enough to stay shut;
no flap pocket, neither the Sewist or I every use it on the bags that we have;
no top-stitching on the outside, not necessary, no desire to wax paper again;
strap, as I mentioned;
tool pocket has more usable slots, for things like cellphones or iPods
and no canvas backing, this things weighs a ton already and is plenty stable.
Lessons learned:
probably the last time for sticky vinyl, too too too hard to deal with for any length of time
and anytime I am dead tired after making a seam, I probably am doing something wrong.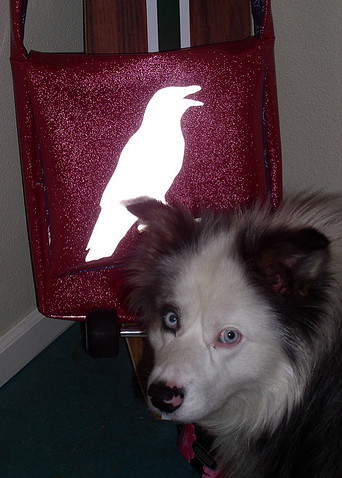
The next bag I make (one that I might actually use myself), will probably be our first adventure in designing a pattern. The Amy Butler Pattern is really great, but I am finding more not to like every time and there are things like shape and size that I would do very differently.
The crow is in honor of our dog, who hates them. We have always joked that if she had her own company it would be called "30 or So Crows" for the number she would like to catch every day. Another sign of our complete dog dorkdom!
Happy Birthday Honey, enjoy!
Wednesday, September 5, 2007
Intern's Ottoman
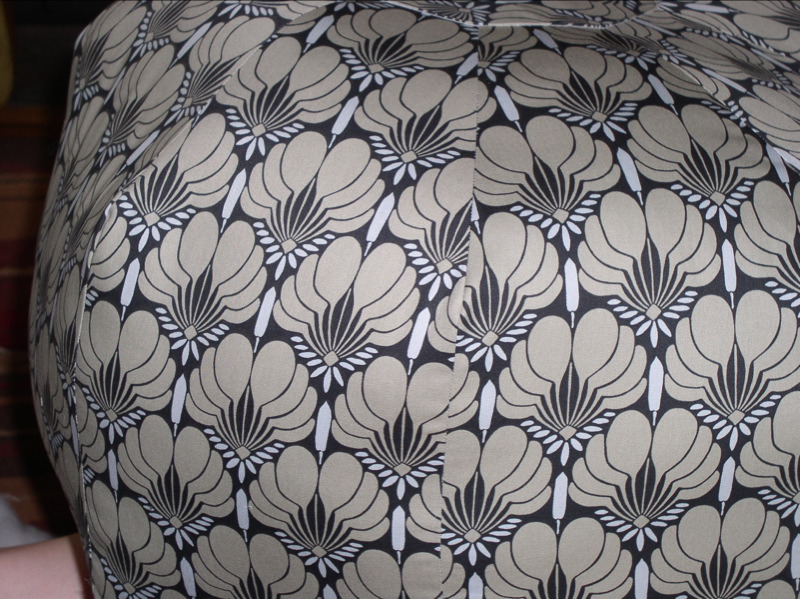
The ottoman for the Best Intern Ever (we wrote about this project on Labor Day) is done. She said she wanted something black, gray and brown, and this Nigella slate imperial fans fit the bill perfectly. This is the fourth Amy Butler Gum Drop Pillow that we've made, so it came together in no time, and was truly a joint effort. We both cut and sewed this one, worked together in the stuffing.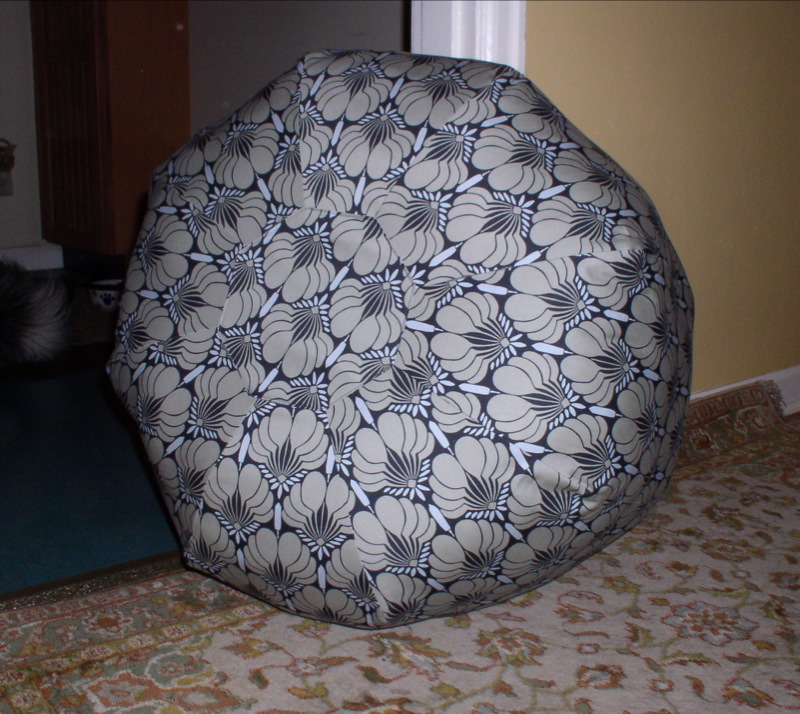
Just like the others that we wrote about here and here, this looks great and took a lot of stuffing. Unlike the others, we used some smarts (thanks to commenter Christina). What Christina suggested was inspired by punching bag guts---take fabric scraps and stuff them in the center with the soft filling all around. Not only was it cheaper to stuff, it actually resulted in a way better loft than the two large ottomans we made for ourselves. It is much firmer and much more "sittable." If that's a word.
The stuffing technique: By the way, the Best Intern Ever loved her ottoman.
Monday, September 3, 2007
It's Labor (of love) Day Weekend
 Here at Casa de Sewer-Sewist we're celebrating the long Labor Day weekend by juggling a bunch of different works in progress. There's nothing like a three day weekend to encourage you to start more projects than you can finish. There's something about that extra day to make you overly-ambitious.
Anyway, Josh is slogging along on another pair of Simplicity 3891 pants. (The photo at the top of this post is Josh working on these pants, by the way.) This time, he's tapered in the leg so it's shaped more like a boot cut pant rather than the exaggerated, ultra-wide cargo leg that is intended in this pattern. Again, he removed the numerous pockets and is just sticking with the patch pockets on the butt and hips. Oh yeah, and, because Josh is not a 12-year-old, he's not putting zippers on the sides this time either. Josh is, of course, infusing his own unique personal style into this project. We've mentioned before that we're big fans of Nordstrom, but too cheap to shop there (except the shoe department, the anniversary sale, the Rack and Sarah's beloved Jag Jeans). Well, a month or so ago Josh spotted some really snazzy cotton Faconnable brand pants that were brown with orange facings and orange top-stitching. Well, these snazzy pants were something like $150! Josh knew that he could create an even more awesome pair of his own "Faconnable" pants for around fifteen bucks. He's also adding a bright orange zipper in the fly.
The fabric (a nice medium-weight Robert Kaufman 100& cotton for both the orange and brown; this stuff is great value and nice to work with):
The orange zipper (note that the partially-constructed pants are laying on the Alice Starmore shawl that it took the Sewist eight years to knit---sewing is definitely more of an instant gratification hobby):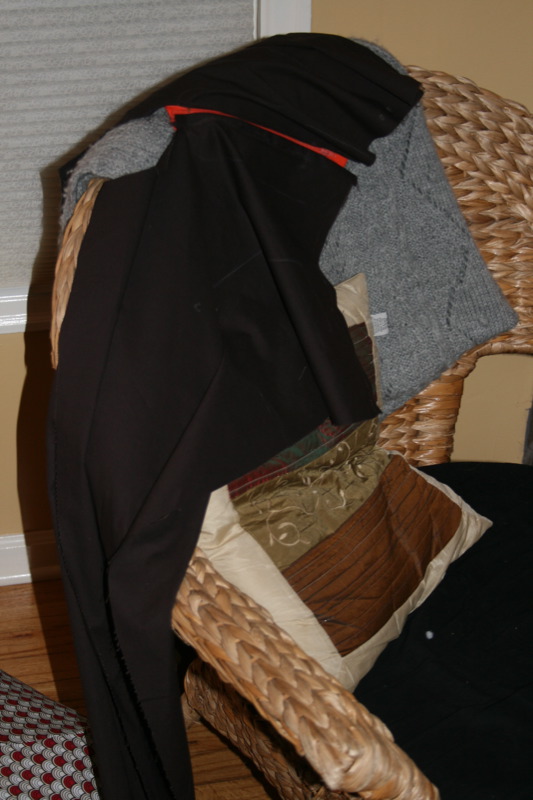
 Sarah's got a couple of projects going on as well, including a Burda WoF skirt from the latest Burda Plus Fashion mag. (Sidebar for a minor rant: On what planet is a Euro 22---which is a petite Euro 44 or a US 44 or a US RTW 12---a plus-sized pattern? It's fine, but just slightly annoying, but the upside is that it opens up a whole other set of available fabulousness that is Burda WoF. It's nice that this is sized for petite, though.) This is in the brown Robert Kaufman stretch Vera sateen that I wrote about awhile back. Apparently, as you can see from the photo to the right, Sarah has completely forgotten how to insert an invisible zipper. This is a nice, classy gored skirt that, once the zipper situation is addressed, will be a good work staple.
Finally, we're working on a project as a gift for Sarah's intern at work, AKA the Best Intern Ever. It's another one of the Amy Butler Gumdrop Pillows, in the ottoman size. (We wrote about this pattern here and here.) Because the Best Intern Ever really doesn't have a lot of furniture, just like all college students, the ottoman seems like a good choice. This one will be in the lovely Imperial Fans fabric from Amy Butler's new Nigella line, in the slate color. It's cut up and ready to be sewn up and stuffed.
Despite all these projects, we've actually been leaving the house, enjoying the last bit of summer here in Oregon.
Sunday, September 2, 2007
Very Green Bag
 from sarah the sewist
(This is one of those projects that is so not my style. But I know the recipient will love it. The shape of this bag is fabulous, but the fabric... It's just so green. I hate green. And the frogs. For some reason, I have not problem with banana seat bikes, garden gnomes or goldfish on my clothes and accessories, but frogs? Not my thing)
I saw this froggy fabric from Heather Ross' new collection for Free Spirit and I new that I just had to make something for my friend (also) Sarah who loves all things green, and especially all things froggy. Enter the Amy Butler Frenchy Bag pattern. This is a very simple pattern really great for showing off interesting fabric combinations. I combined this with a green that appeared in both of the main fabrics. (In fact, I think this bag may encompass 90% of the naturally-occurring shades of green.)
The result? Well, pretty green.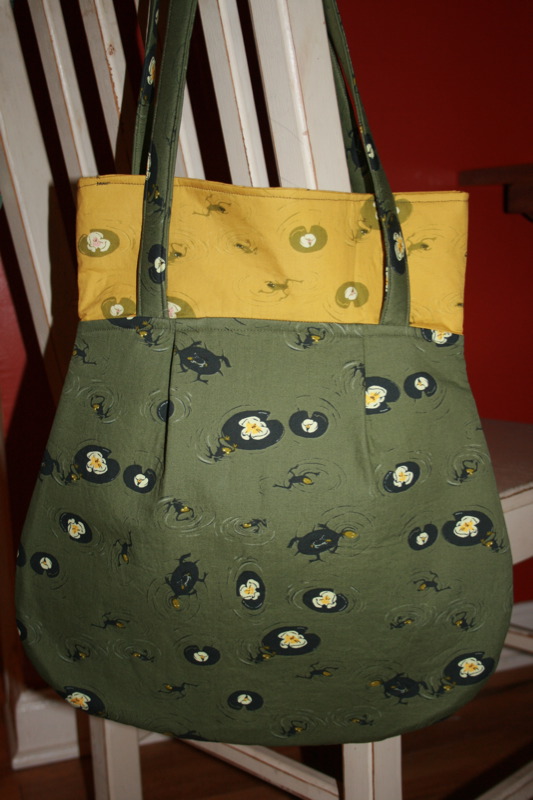
The Frenchy Bags (I made the larger, shoulder bag version) come together really quickly and easier, just like the other Amy Butler patterns I've used lately. However, like everything I sew, I had to tinker a bit.
First, I think this bag is supposed to have four pockets, not two. If it isn't, then dividing the two large pockets into four is definitely an improvement---they sagged inside the liner until I sewed them in half. Now the pockets are perfect for a cell phone (my pal has, of course, a green phone that'll look awfully snazzy with the bag), smaller wallet, compact, that sort of thing.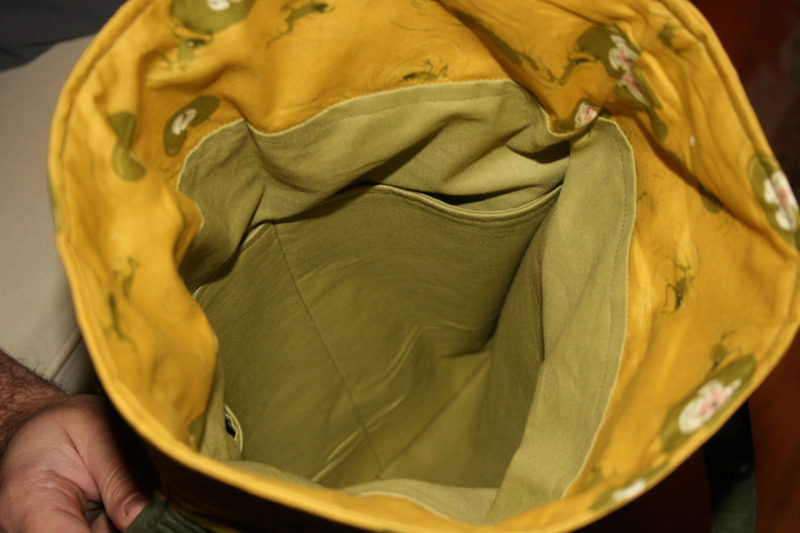
I also omitted that magnetic snap for a few reasons: it isn't really necessary, because this is a shoulder bag, so hopefully your arm will keep the bag closed as intended; the opening for this bag is actually on the small side, as it tapers where the two fabrics are joined; and, I didn't have a magnetic snap, and really didn't feel like searching one out.
The biggest modification that I made was that this bag calls for sew-in interfacing, like Pellon 40. Anyway, I really hate sew-in interfacing. It's a pain, wastes thread and just annoys me for some reason. (I accidentally bought three yards of it a month or so ago and have been trying to use the stupid stuff up.) Anyway, knowing that my friend is a very busy teacher/dog walker/pet sitter, and that she's always running from place to place and, therefore, this bag will probably really take a beating, I decided I wanted to make this thing a bit more durable that it was originally designed.
Searching through piles of fusible interfacing at Fabric Depot, I found something that looked promising: "Fusible Fleece." Now, I have no idea what fusible fleece is, but the lady who cut it for me thought that it was probably something you use for quilting and other related crafts. Anyway, it felt squishy, not like stiff Timtex, and seemed like it would do a bit more to protect the contents of the bag from abuse. Needless to say, I think this decision was a good one. Excepting the pockets, I used the fusible fleece everywhere the sew-in interfacing was called for. The result was bag that had a lot of body. Which isn't a very good description, but better than "slightly puffy."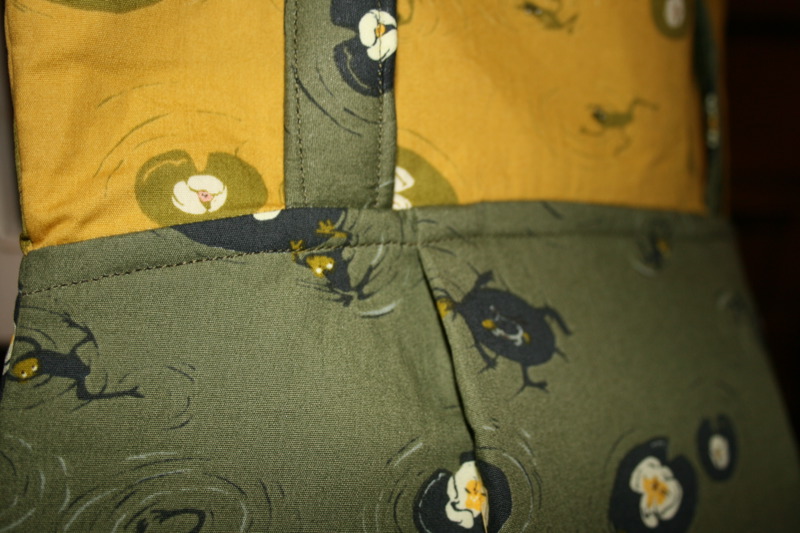
Basically, by using the fusible fleece, I created a bag that has a really defined shape, but still is relaxed looking. What I'm most excited about, though, is the way the handles turned out. You can see in the picture that they have a padded look, and, as a result, feel extremely comfortable on the shoulder. Since this is a shoulder bag, that's pretty important. I think that I'll do this to bag handles from now on.
We agreed that quite a few people will likely be getting these bags for Christmas this year---it's that simple to put together.
As always, the dog got in on the action:
