Showing posts with label Finished Projects. Show all posts

Saturday, November 24, 2007

Rip City Raglan

This post has moved to our new blog. The direct link to this post is here.

from sarah the sewist


People who know me, usually know at least this one thing about me---I am a tried and true, dyed-in-the-wool, unwavering Portland Trail Blazers basketball fan. It's a bit embarrassing, because I think that I'm a fairly interesting person with a variety of things that I do and am interested in, but I have actually had someone (my boss, which makes it even worse) introduce me to someone else like this, "I'd like to introduce you to Sarah. She's a huge Trail Blazers fan." No, this didn't make sense in the context of the conversation. So anyway, I've always been a Blazers fan, always will be.

Anyway, Blazers season started this month, and we've gone to three games so far. I have some pretty cute Blazers T-shirts, but I've noticed one tremendous problem: the terraced style of the seats combined with the seats' odd, woven upholstery has a tendency to grab onto whatever you're wearing and pull it upward, my jeans will then of course, slide downward. Not a pretty sight for those unfortunate folks who are seated behind me. Since I have a tendency to leap out of my seat (poor Josh, he's such a good sport about my Blazermania [that's what it's called here]), this is a situation that desperately needed addressing.

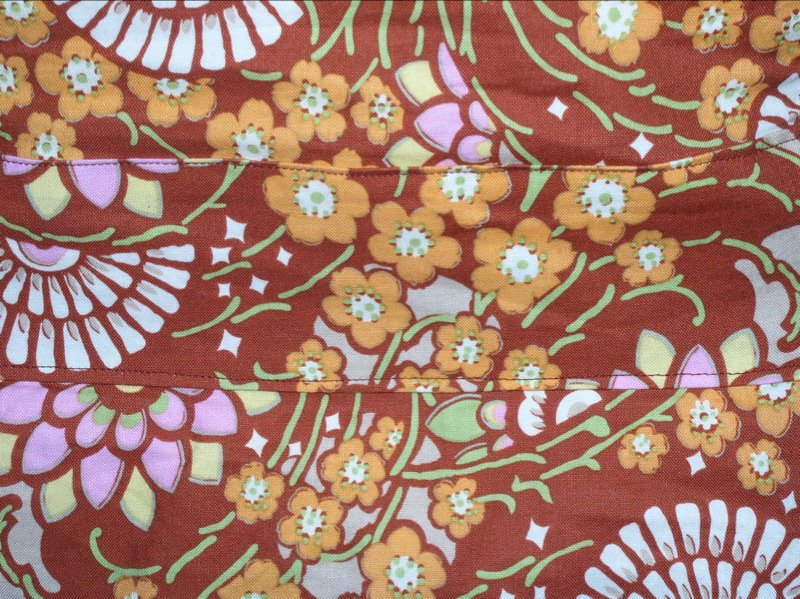
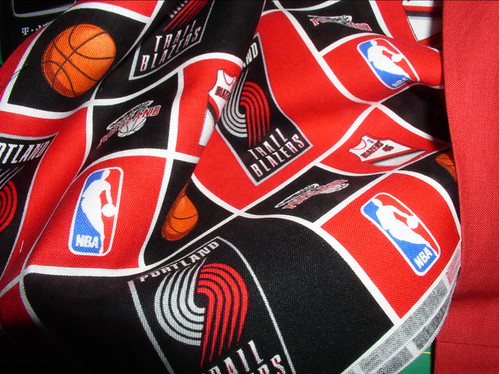
Josh found this fabric to the left at Fabric Depot on Friday (we desperately needed some Stitch Witchery and braved the post-Thanksgiving crowds) and snagged a couple of yards for me (fabric and the Trail Blazers---in my world that's perfection, true perfection). A few weeks ago, when we were at Portland's new IKEA store, I picked up some vibrant red cotton to use to make muslins of some Butterick dress patterns I'd purchased recently.

The two had to meet. It was fate.

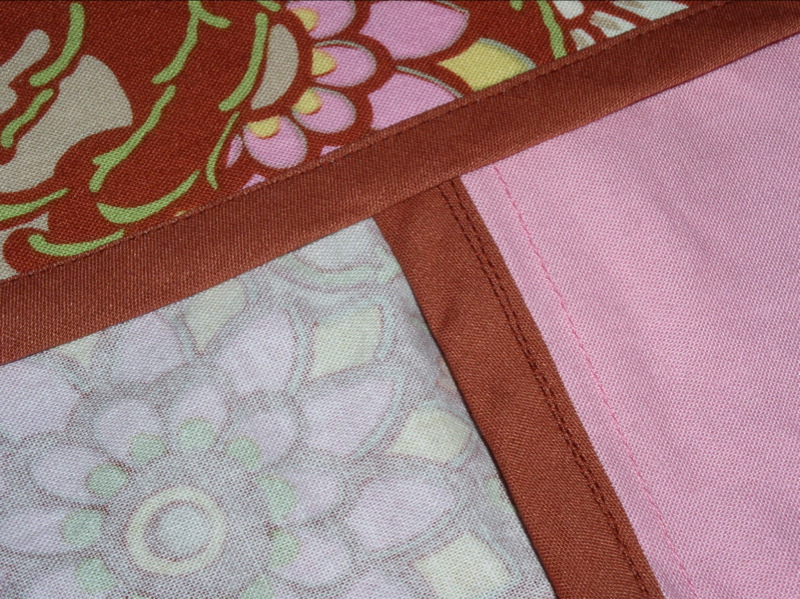
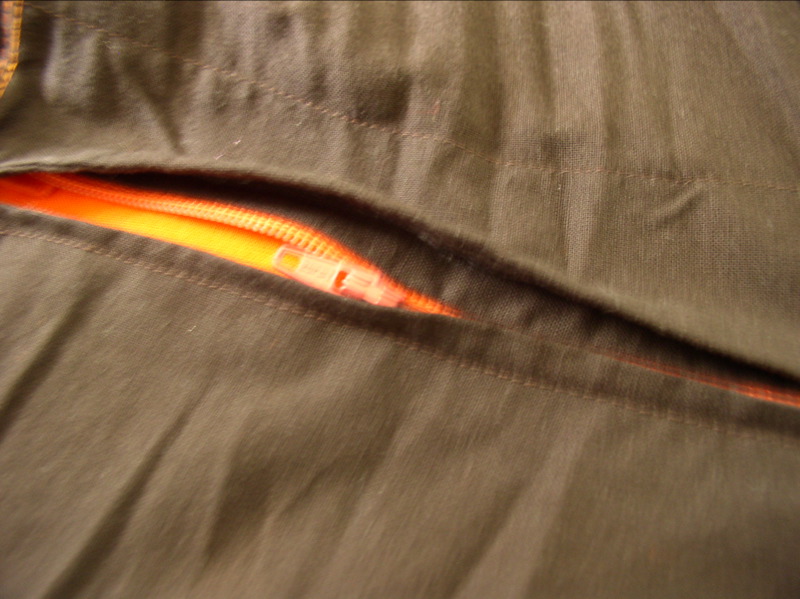
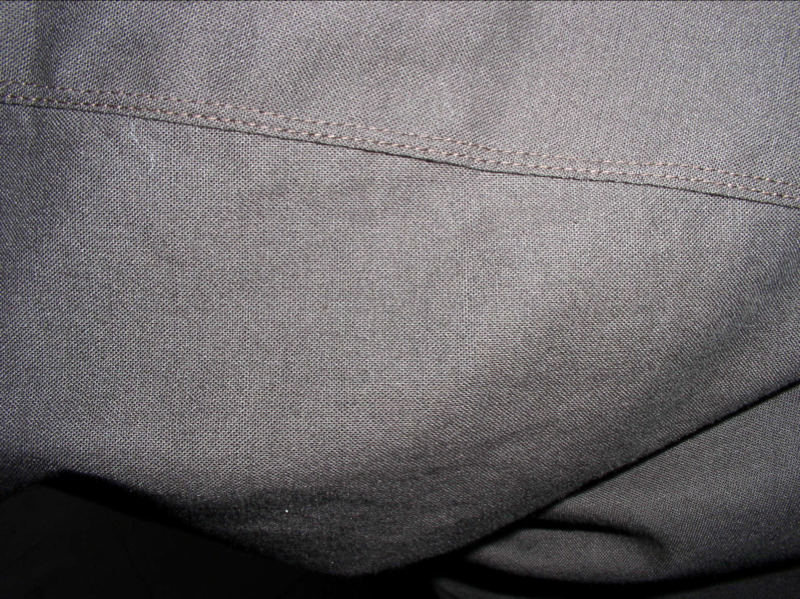
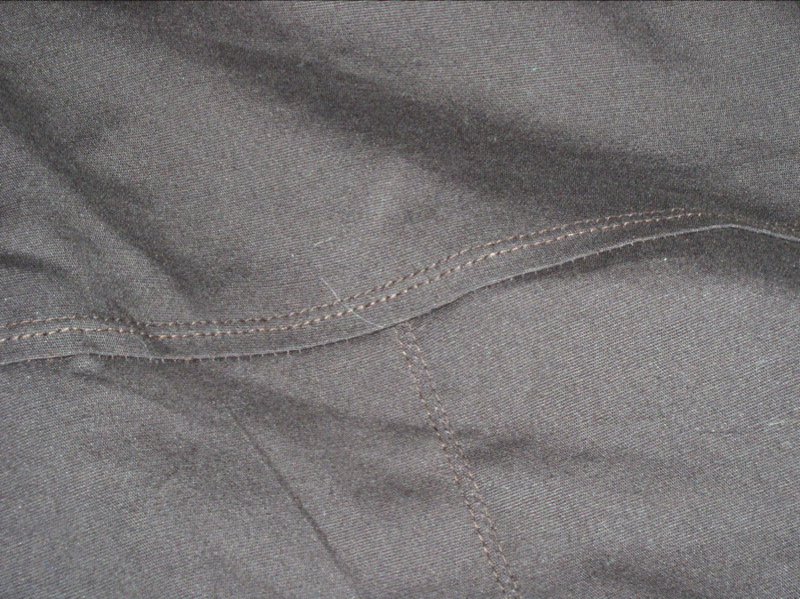
I whipped up (pretty much literally, this pattern takes basically zero effort) another Built by Wendy/Simplicity 3835 dress/tunic---this time in the shorter mini-dress/tunic length to wear over jeans. But long enough to sufficiently cover my butt when I leap out of my seat. I didn't make the collar with this one, instead opting for the elasticized neckline in the alternate view (although I kept the back darts for shaping). I also eliminated the zipper, since I don't used the zips much in two other versions that I've made of this dress---the modified neckline is large enough to just pull over my head.

However, I wasn't done...

I cut out one of the Trail Blazers emblems out of the fabric, backed it with some fusible fleece, and stitched it around with a narrow zig-zag in black. This went onto the bottom left hand of the tunic, like the tags on the players' jerseys. (Yes, I know I'm a lunatic...please don't hold it against me!)

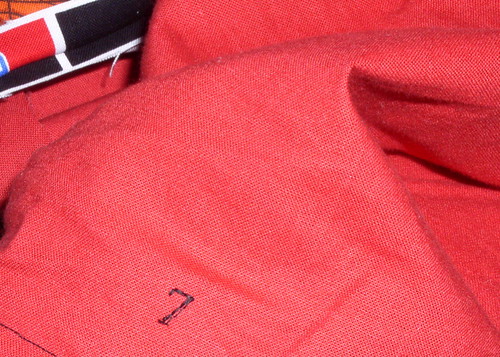
Finally, my last bit of embellishment was the addition of small number 7s in black (Blazer colors are red and black) on each arm. Why the 7s? Well, 7 is a very important number for the Trail Blazers. They won their first and only championship in 1977 (a couple of months before I was born---my mom has a complicated theory about how this influenced my becoming a Blazer fan). In 2007, they only had a 5% chance of hitting the #1 pick in the NBA Draft Lottery, and they won, resulting in the drafting of Greg Oden (center from Ohio State---Josh, being an Ohioan, was thrilled, as was I). 2007 was also the year that Brandon Roy won Rookie of the Year, which was pretty exciting. Oh, and 7 is also the number that Brandon wears, and he's probably my favorite player at the moment. Plus that whole lucky number seven thing. (When I made this yesterday for that evening's game, the Blazers were on a five-game losing streak, so a little luck is probably not the worst thing.)

So, after making this yesterday, I wore it to the game against the Kings. It was an awesome game---and the Blazers broke their losing streak (although it was pretty exciting, and was really close). The length of the shirt did the trick, too.

So, I guess this shirt's record is 1-0.

Sarah @ Blazer Game

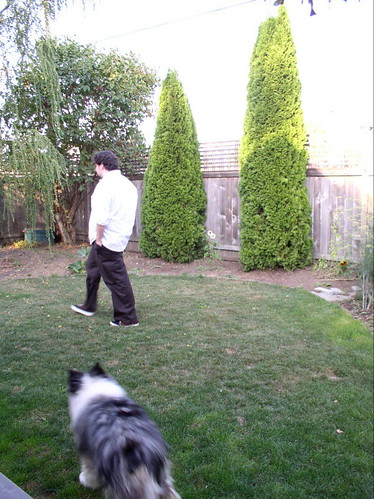
(In case you don't recognize the location in this picture, that's me at the Rose Garden before the game.)

Sunday, November 18, 2007

Unzipped

from sarah the sewist

Sometimes things go wrong and you just want to give up. Generally, in sewing, given that it's not really a life and death sort of thing, that's the path I choose. In fact, I have been known to give my husband a pep talk or two about how it's okay to just stop a project that is just not working. He is yet to take my advice, but he hasn't been sewing that long.

When I got my August issue of Burda World of Fashion, I was excited about the nice-looking pair of jeans in this issue. Unlike a lot of BWOF stuff, there was no weirdness to these jeans (not that there's anything wrong with weirdness)---they were just a normal pair of pants. Around that same time my mom (who taught me everything I know about sewing) bought me three yards of amazing charcoal and black herringbone corduroy. (I have a long-time love of all fabrics that are textural like this---herringbone, houndstooth and plain old tweed all make me very happy.) This fabric and the Burda WOF pattern were destined to be together.

These pants came together very well, which I have come to expect out of the Burda magazine patterns. (I actually think that their World of fashion patterns have better drafting than their envelope patterns---although that could also be because I get the chance to "get to know" the pattern better in the magazine because of the tracing and seam allowance addition.) They looked great. I especially liked the way that the pockets turned out. I even recreated the waistband, since this was one of their "plus" patterns and the waistband was waaaaay larger than I needed, and made it wider and contoured. I thought I was pretty awesome. Oh, and I did all of this in the span of a single evening.

Then I got strep throat. (Yes, strep throat at 30---fun stuff.) So I didn't hem them for about two weeks after they were basically done.

Last weekend I pulled them off of their resting place on top of our Gumdrop Ottomen in our living room and hemmed them up. I tried them on and they fit great. Really great. They were slimmer fit than I had expected, but I've noticed that's a trend with BWOF, so it wasn't that surprising. But I did think that the zipper seemed a bit sticky. Not thinking anything of it, I wore the jeans around the house. Then I heard it...pop, pop, pop. Oh, yes, I had managed to install a defective zipper in my pants. The teeth, it turns out were completely warped, bent like they'd been stepped on and twisted. While only two or three coils actually popped completely out of the zipper, most of the other were not long for this world. So, I did what any sane person would do... I screamed a lot of stuff that would not be appropriate to repeat in this blog. Then I ripped the whole stupid zipper out, not thinking, of course that I had no idea how on Earth to re-install a zipper.

Anyway, I won't go into the details of my drama with trying to put the new zipper in the pants, but let's just say it took pretty much an entire week to figure out. And---the horror!---it involved me hand sewing. Which is pretty scaring. I got the stupid thing in the jeans and functional, but it's really not that pretty, to be honest.

But, the jeans do look pretty good...


Anyway, this is a great pattern, and I'll probably use it again. I'm pretty proud of myself for not being a quitter with this one, although it was my instinct. I did learn two things through this whole mess, though:

  1. Always check your zipper coils before you use the zipper.
  2. Through my searching for a solution to this problem, I discovered that there are professionals (tailors) who will fixed broken zippers for you. Next time (I really hope there's not a next time), I'll go that route.

Monday, November 12, 2007

Another one down...


We're plugging away with our Christmas gift making, and finished this up recently---an Amy Butler Swing Bag for Josh's mom. It's in one of Amy's fabrics, two different ones from the gray and yellow theme from the "Belle" line. A lot of people have made this bag, and we can certainly see why. It comes together quickly and looks really sharp. It could use some pockets, but then it wouldn't be as simple to make reversible---not that that's a critical feature of the bag, but it's a nice novelty. We think she'll enjoy this one.


There's been a lot written about this pattern, and people have done beautiful interpretations of it, so we'll not bore you with what a great pattern this is. But, we would definitely recommend this if you're working on handmade holiday gifts, as it doesn't take a ton of fabric (so you can splurge on something nice) and is so, so, so fast to make.


P.S. We're working on some changes to this blog, so our links to our blogger friends have disappeared for some reason... The links will be back once we finish with the upgrades, we promise.

Monday, November 5, 2007

Call of the Wild Hat

We've mentioned before that we're trying to make most---if not all---of our Christmas gifts for family and friends this year. We've coined it the "Great Making Everyone's Christmas Gifts Odyssey." It's just so much less expensive and seems more thoughtful. Plus, it's a great excuse for Josh to get more practice sewing and build his skills on items that you don't have to fit.

Josh's grandfather is a pretty cool dude. He's really hip (probably a better dresser than either of us on any given day), his hair always looks perfect and he's funny as all hell. Recently, Josh's mom got his grandfather a Kawasaki Mule, which a tractor-like thing that he has been using to drive up into the his above his house in Appalachia. It's been great for him because he can't get around as well as he used to (he had a pick-up truck land on top of him once). Anyway, we decided that he really needed some appropriate accessories to go along with the Mule.

Josh picked up some tough-looking snowboarding goggles at Costco that he thought would be helpful when his grandpa is out in the hills on the Mule, because it doesn't have a windshield. But, really, you can't wear goggles like that without some head-wear to balance out the whole look.

Behold Burda 7996.

Yes, indeedy. Who knew that you could make your own hats? (Well, probably most of you knew that, but we'd sure never thought about it before. Although, in fairness, Josh does have a mild hat obsession, so it was bound to happen sooner or later.)

So, we whipped up this one last night in the same faux shearling fabric that Sarah's using to make Josh's birthday coat.

It was super easy to sew, and came together in about an hour. This was a really fun project and not hard to sew at all. The tip Burda provided about picking the hairs that are stuck down by the sticking out with a pin worked great and resulted in a fairly professional look (as professional as something like this can look). It was surprising how cooperative the faux shearling was, although we'll be pulling fluff out of part of our sewing machine for quite awhile.

Needless to say, it's the perfect gift for Josh's grandpa.


Oh, and the dog tried it on for size. (It had been awhile since she'd made an appearance here. The dorky thing is, we'd put the hat on her, even if there wasn't a camera or blog involved. That's just the way it is in our house.)

It was sure nice to do a joint project again, too. They're just so much more fun.

Thursday, November 1, 2007

Velvet(een) Rabbit (nope), Elvis (no), PANTS!

from josh the sewer


Yes indeed, I have made some velveteen jeans. I am pretty damn excited about them (can you tell?), but will have to wait until the winter air blows through these here parts. As you can imagine they are a little bit on the warm side. A while back the Sewist and I were at Bolt buying something or other when under the main counter a shelf of 50% off pinstripe velveteen called to me. After spending a couple of days thinking about what kind of pants I wanted to make, we decided that jeans would be really cool. I choose this Kwik Sew 3504 pattern (really there aren’t a ton of choices, but I am taking a Burda break while I slog though the jacket).

Why velvet pants? When the Sewist and I were in graduate school in Ireland (yes sometimes it is important that you travel great distances to acquire knowledge that will be of little use to you in the future, oh, and I will avoid student loan whining, it is so passé) I used to walk by a shop everyday in the way to class that featured a Blue Velvet suit in the window. I was absolutely taken by these garments. There were two problems: the first was that I was a little bit broke at the time and the second was that there was nowhere that I would actually wear a velvet suit to. There were poshy bars that this suit would not have looked out of place in, but I would have. I was more of beer drinking good time guy (yes I was much thinner before I left for Dublin, still regretting too many beers).

I think I should step back and let you know more about the magnificence of the velvet suit. It rains a lot in Dublin and I know you have heard that all before. It rains in Portland, but nothing like it does on the Emerald Isle. When we were living in Dublin (1999-2000) they were in the midst of some serious economic expansion and to go hand in hand with that a housing shortage, especially for rentals. We took the first flat that we could find and afford, which was actually really nice in a brand new apartment block right near the Guinness Brewery (cool!), a really shitty part of town at the time (not cool!). Oh the things we saw, smelled and felt. Really kind of a depressing place to be. Plus, it turns out that the outside windows were installed backwards so they trapped moisture instead of letting it out; leading to a mushroom bloom under our “dresser” (cardboard, high quality). After walking along the River to get near downtown (before they banned commercial trucks) and cutting through the city building I passed Cuan Hanley’s Shop (thanks to the Sewist, for remembering this, I only recalled that he married the gal from Riverdance). This Blue Velvet suit was like some sort giant rhinestone on the gray wool that was Dublin (gotta love fabric metaphors). Seriously I loved thing, I still regret that I didn’t get it or even take a picture of it. It was just so cool to see something so incredibly bad assed and so (be prepared I am using this as word and not a prefix) ANTI to the smoggy rainyness.

As an aside, Dublin was really cool at the time featuring some great art, design, fashion and drunk soccer commentators; really we are missing something here in the US---a tumbler of whiskey should be a REQUIREMENT for all pre and post game tv shows. I am sure that some day the Sewist can put together a post how interesting the fashion was at this time. Since I am so far afield at the moment I have got to say that the Sewist was knitting some cool stuff at the time, third wave feminism and all (you weren’t alone Stitch n’ Bitch!) We have a really close friend, a photographer who at one time studied fashion in Manchester. She designed lingerie out of things like bicycle tire inner-tubes or the like (not sure exactly). She left fashion school, which is a shame because she was really far ahead of the curb; I believe that she would have dominated all of the recycled clothing fashion shows and competitions. Seriously, she too is bad-ass and a great photographer.

The idea of a velvet suit has stuck with me for quite some time; I remember that Samuel L. Jackson wore a maroon one to something or other (very impressed, but not enough to remember the occasion). Every morning, I drink out of my Elvis mug. Which features the King wearing some kick ass pinstriped pants, but also a really strange shirt and large belt, neither of which I would want to replicate. These pants are an homage to the velvet suit and my King mug. Could I see the King wearing these pants, hells yeah! Which again elevates them in my eyes, now I should mention that I believe the King would have to wear them while touring Alaska, Norway or Bemidji, Minnesota; and he would have to be alive (no conspiracy for me, anyone who mixed that much peanut butter with that many barbiturates is certainly dead).

Since this is a sewing blog and not me being boring at a party, I should talk about the pants coming together. The velveteen was really messy; I am still finding pills of it around the house, lurking in corners away from the Hoover. Sewing across the grain was really difficult and required lots of ironing to make things like the pockets lay flat. The Sewist did a blind hem for me on the legs that I really like. Still haven’t made the carriers yet, the first two attempts have featured me failing; I have got one more attempt in me to get it right.

The Pattern was great, except the waist was a little a long and the back pockets were too big and placed a little too low. I did do my first major pattern alteration (aside from length)---I lowered the rise by about an inch and a half---these are pretty high waisted as is. I did view "B" the boot cut version. The Sewist found the matching fabric in the scrap bag from which I made the pockets. The technique in making the fly was really common sense and the final product looked nicer than any fly that I have done previously. With some rivets we could probably make a more than reasonable facsimile of a ready-to-wear pair of jeans. All in all a very nice pattern and with nice results.

Tuesday, October 23, 2007

Pretty in Plaid

from sarah the sewist

We've been pretty lazy with our blogging lately... I guess the annoying combination of our digital camera going a bit wonky and the shift key on the laptop not functioning has taken its toll. Nevertheless, sewing has continued. In addition to the Christmas sewing we've been doing, Josh and I both finished up some clothing projects.

Awhile back I got this Built by Wendy pattern at one of the Despot's $2 Simplicity pattern sales. I thought that the top pattern would be a handy one to have, especially for cheapo summer tops and the like. However, after making a tunic (out of a hot-pink floral remnant---which kind of works, actually) out of the collared dress view, I decided this was a pretty fun, versatile dress pattern. If you remember, I had some back luck with a dress this summer, so I've been gun-shy with the dresses ever since.

Anyway, when I made my first version of this pattern, the neck was incredibly annoying---it came up very high on the neck in a tight crew neck. I hacked away at it until it was tolerable. Which was basically the entire neck band. I also didn't like the gathering around the entire neckline; it created an odd puffiness in the front of the dress that was not that flattering.

I did cut the neckline on the bias and matching bias-cut panels to trim the bottom of the dress. I wanted to trim the sleeves this way, too, but I ran out of fabric. It looks pretty snazzy, nonetheless.


I made an amazing discovery at the fabric shop in my neighborhood---Maywood Woolies flannel. This stuff is pretty amazing. It really and truly looks like wool. It also drapes like wool. But you can wash and dry it. Unlike wool. It also doesn't itch. Unlike wool. Basically it's badass stuff. I am taking a weird delight when people compliment me on the dress in telling them that it's not wool.

I think more of this will be on my shopping list... It also comes in herringbones, houndstooth and tweeds. All of my favorites. Those of you who've been reading for awhile know that it's very bizarre that I made myself a green article of clothing. I've justified it by calling this "olive."

I thought I was terribly creative using a plaid fabric for this dress. Until I sat down to write this blog post and noticed the envelope picture. Oh well.

Nice fall color huh? And the leaves aren't too bad either.

Monday, October 1, 2007

If it were raining on the moon...

from sarah the sewist

And I were an astronaut stuck in that lunar rainstorm, I'd have just the thing to wear.


You may remember a few months ago that Josh and I scored a serious haul of fabric from Rose City Textiles that was rather eclectic. Basically, it was a bunch of random, slightly sporty stuff that was only a buck a yard. Among that was some lovely satin waterproof stuff of unknown fiber content---I can guarantee that there's absolutely nothing natural. Anyway, I got about eight yards each of brown and blue. The brown is super-classy; the blue, not so much.

Anyway, it's started raining like all get out here in PDX, and I only have one raincoat (living in Santa Fe for three years will do that) that I have had since college. It's pretty ugly and has no hood, which kind of defeats the purpose of a raincoat in my book, since I'm a disaster with umbrellas (they always break on me). I keep it at work for rain emergencies, when I have to run across the street for coffee and the rain is just too torrential.

I bought a few of the Built by Wendy Patterns at the Fabric Depot when they were having one of their $2 Simplicity pattern sales. I've used all of them that I bought that day (someday I'll tell y'all about my waaaaay too low rise BBW jeans debacle---use your imagination) except 3694, which is a hoodie/dress pattern. I figured this would a be a quick and easy raincoat---which it really was. Well, beyond the little incident Josh shared with the world today. How mortifying.

I just think the whole thing looks fairly ridiculous, though.


With the floppy, A-line sleeves, I could take flight (maybe that would come in handy on the moon?).


Anyway, the jacket served my purposes, a new raincoat with an actual hood for under $5.

A few "design" notes: I top stitched the fronts of the raincoat, as well as the sleeves, where they attach to the body of the coat. I finished all of the seams with navy bias tape, which does go a long way in making the jacket look more professional, and less goofy. It's a good thing, too, because this fabric ravels, ravels, ravels. I'm hoping that the finishing job helps to keep the whole thing from falling apart. I also used a parka-style separating zipper, which looks fairly snazzy, although it does add to the overall moon rainstorm effect.


(Random weirdness: in this last picture you can see peeking out from under my new lunar raincoat, I'm wearing my Brandon Roy rookie t-shirt. Woo-hoo! Trail Blazer training camp starts this week!)

Wednesday, September 26, 2007

Out of the Trenches

from sarah the sewist

My Indygo Junction Trench Topper that I was sewing as part of the Great Trench Coat Sew-a-long on Pattern Review is finished and I broke it in by wearing it to work today. I was a little uncomfortable with it just because it's a lot louder than most of my wardrobe, but it worked with dark jeans, a white collared blouse and my black cowboy boots. Someone even told me that it gave off a "vintage cool vibe," which sounds good to me. Not to mention, Josh and I went out to The Screen Door (yum!) for dinner this evening, and he claims that two diners noticed on my jacket. My style is generally not that noticeable, more cute than anything, so it's kind of nice to have something distinct and eye-catching.


I wrote about my progress here and here and it was really fun knowing that there were quite a few other folks working on a trench at the same time---although mine is more of an indoors jacket, rather than the outwear most of the others on Pattern Review are planning and sewing. It's funny, I was planning on sewing this jacket, but it jumped to the top of the queue when the sew-a-long was announced. The super-cool Amy Butler print from Bolt in an unusual cinnamon color and the lovely pink Moda fabric from Fabric Depot for the contrasting bands were a fun combination.

I covered the issues that I had with this pattern in my last blog entry, but I do want to re-iterate that while I had some problems, they were completely fixable and Indygo Junction seemed very happy to get the feedback about the errors in the pattern drafting. The other thing I noticed with this pattern is that it's already rather petite-ified. By that I mean that I didn't shorten the sleeves, and only took in the shoulders a smidge---which was great for me. My fix to the belt issue worked, and I think it looks like it was supposed to be this way.


Anyway, since this jacket is unlined, and since the Sewer and I don't have a serger (waaaah!), there was a lot of seam finishing on this jacket. Which was a colossal pain in the butt. Well worth it, but a pain, nonetheless.


I also faced the pink bands at the sleeves and bottom so that they'd have more of a structured look and flare out a bit more. Which I think turned out pretty nice, since the two fabrics were different weights. The contrasting bands actually, oddly, toned down the busy look of the main fabric, which is sort of interesting.

I must have placed the three stupid button on this jacket at least three times. Each. It was really difficult to figure out the right spot for the buttons, and I still not completely satisfied with the way the buttons look on the jacket. I am really crappy at hand sewing and avoid doing so at all costs. Our sewing machine does a lot for us---including auto buttonholes and it's really easy to use the machine to attach buttons. However, like I mentioned in a previous entry, the buttons I chose for this jacket were too big for the auto buttonholer, and it turns out, also are too big to sew on with the sewing machine. Which sucked. So I spent all of last evening sewing and re-sewing the buttons.

Basically, the buttons won.


I'm planning to make this trench again, especially since I've worked out all of the weirdness with the pattern, and since I have a decent stash of raincoat fabric on hand.

Sunday, September 16, 2007

Pants-Pants Revolution!

from josh the sewer


I have this friend who a couple of years ago was obsessed with Dance-Dance Revolution. He and his wife used to have dance offs and he was always getting off the phone to play the game. I have never played it before in my life, but I dedicate the title to him (and puns make good titles for blogs).

Anyway the pants I made were the second go 'round of the Simplicity 3891 cargo pants. Like the first time I left off most of the pockets and decided to pass on using the zipper on the leg, but instead of cutting the legs out at the pants line I cut them at the zipper line to make the legs narrower than before. This resulted in a much more reasonably-sized leg circumference.

The pants are made with Robert Kauffman Kona Cotton in chocolate brown and the facing is made with the same fabric in caution orange; both were from Bolt. While at Nordstrom not too long ago I noticed a great pair of chino pants that were this color brown with orange top-stitching and details, the problem is I don't pay $150 for chinos; while there is nothing wrong with this, I just can't do it. In that same vein, to give the pants a more finished look I decided to take inspiration from Nordy's and the Sewist's latest skirt and use the twin needle to add some detail. I used brown thread to twin needle the pockets and the inseam. To do the hemming on the pants legs and to sew the facing down, I used the orange thread with the twin needle. I had some orange thread left over from a long ago project and when I bought the second spool I got the same color except it was made from cotton instead of silk, I like the effect of the subtle differences in shade.


I also went with the caution orange zipper, just to pull the whole look together. Creating the fly was much, much easier this time and required far less intervention from the Sewist.


I love the way these pants fit and look. This was my first attempt at making something fancier than the pattern called for, which was a nice way to be creative and not go too far above my skill level. It was also the first time I actually changed any major component of a pattern (I've left stuff off, but never really altered anything intentionally.) Oh yeah, I should add that I used a button to close the pants instead of Velcro as called for (actually, I did this in the first pair as well)---I am committed to keeping my pants from falling down in public.

This also marks a major milestone in my sewing---this is my first completely seam ripper-free completed project.

Thursday, September 13, 2007

Another Burda WoF Skirt

from sarah the sewist

Between my Burda World of Fashion magazine subscription and my Sew What! Skirts book, I will never, ever have to purchase a skirt pattern again. This is a good thing, 'cause I'm cheap and skirt patterns always seem like a waste of money, since I'm probably not going to make a bunch of the same skirt. Pants, yes. Skirts, no.


This is the most recent skirt I've made thanks to Burda WoF. This is from their current "Plus" Fashion magazine (see minor rant on their "plus"designation here). It's sort of view "A" and sort of view "B" of style #406. I used the technical drawing for 406A as my inspiration, but the shorter length of 406B.

Wonderfully, Burda has enough sense to include---in all their magazines---a variety of styles for different body types, and I'm loving the fact that this skirt was already sized for those of us who are not exactly tall. (I'm 5'4", but the fashion/sewing pattern industry has decided that I'm some sort of super-short freak, even though that's just a smidge shorter than the national average of 5'5". I often try on pants and they're probably 7 inches too long.) Anyone, wonderfully, there was no petitizing of this pattern for me, which fabulous.

I made this in the lovely brown stretch cotton sateen I got a Bolt awhile back, the same stuff I used for my super-awesome pink Hot Patterns shirt. I probably could have made better use out of this fabric by making the Hot Patterns Razor Sharp Classix Nouveau pants that I had been planning, but it's fantastically comfortable for a skirt, just doesn't drape and flip like Burda intended for this style. Which is fine with me.

I added a little pizazz to this one by taking a cue from the technical drawing above and adding a lot of topstitching.


I topstitched on either side of the panel seams with the twin needle, switching to a single needle when the panels split and the gores are inserted. (Does that make sense?) I also twin needled the seam when the yoke meets that panels and the hem. All together, it really creates a tailored, professional look. (The rich brown doesn't hurt either.) Oh, and you'll be relieved to know that after four and a half attempts (!!!) I finally conquered the invisible zipper that just wouldn't cooperate.


(I'm still not sure about the Built by Wendy blouse I'm wearing in this picture. I've made it twice, but it's not been quite right either time.)

Saturday, September 8, 2007

Cat-tastic!!!

We don't have a cat. In fact, both of us are horribly allergic, and our dog thinks that cats are extremely suspect. So, no cats for us. However, we've got a lot of kitties in our extended family. Since we're beginning to embark on our Great Making Everyone's Christmas Gifts Odyssey, we decided that Josh's dad's cat, Lieutenant, really really needs a Kitty Tunnel from Amy Butler's In Stitches book. (We'll review the entire book soon---promise.) Not only that, Lieutenant needs, really needs, a funky-fresh, Miami Vice-style lime green flamingo print Kitty Tunnel lined with hot pink fluffy fur.


This is a super-basic "pattern" in the book. There actually aren't any pieces included, you simply go off of some measurements Amy provides to draft a tunnel and drawstring that's lined with faux fur. Basically, it's like a tube that closes on the end---apparently cats like to have options in their Kitty Tunnels, sometimes they want to go all the way through the tunnel, other times, they want to snuggle up in a cave.


The picture from the book really shows a nice Kitty Tunnel that seems to fit in with the decor in a tasteful way. Our finished product is not exactly what normal people would call "tasteful." Josh's dad will love it. Love it. Seriously, it sort of sucks that we have to wait a few months to send it, because the result is so bizarrely awesome, that we know it'll be a hit. Even if you don't go a little over the edge like we did, this is a quick-to-sew, simple, inexpensive project that will probably thrill the cat or cat-lover in your life.


Our dog's stuffed raccoon toy had to stand in for the cat in this photo shoot. Needless, to say, the dog was not impressed.


(We swear, we don't encourage our dog to get in the pictures. She's camera ham. If we get out the camera, she's there. It's been that way since she was a puppy.)

Wednesday, September 5, 2007

Intern's Ottoman


The ottoman for the Best Intern Ever (we wrote about this project on Labor Day) is done. She said she wanted something black, gray and brown, and this Nigella slate imperial fans fit the bill perfectly. This is the fourth Amy Butler Gum Drop Pillow that we've made, so it came together in no time, and was truly a joint effort. We both cut and sewed this one, worked together in the stuffing.


Just like the others that we wrote about here and here, this looks great and took a lot of stuffing. Unlike the others, we used some smarts (thanks to commenter Christina). What Christina suggested was inspired by punching bag guts---take fabric scraps and stuff them in the center with the soft filling all around. Not only was it cheaper to stuff, it actually resulted in a way better loft than the two large ottomans we made for ourselves. It is much firmer and much more "sittable." If that's a word.

The stuffing technique:
By the way, the Best Intern Ever loved her ottoman.